The Chemex is one of the great tools to make your perfect pour over coffee. If you are a coffee enthusiast, you should try the Chemex. I guarantee you’ll love it. For one, it’s a great showpiece on your countertop. Second, its design is proven and long-lasting (it has been around since the 1940’s). And finally, produces top of the line coffee.
If you can get the brewing process right.
Click here to check the price on the most popular Chemex model on Amazon,
In this article, I will explain the best basic methods for making great coffee with a Chemex, explain what equipment you’ll need, which factors influence the taste of the final product, and how you can experiment.
What is a chemex?
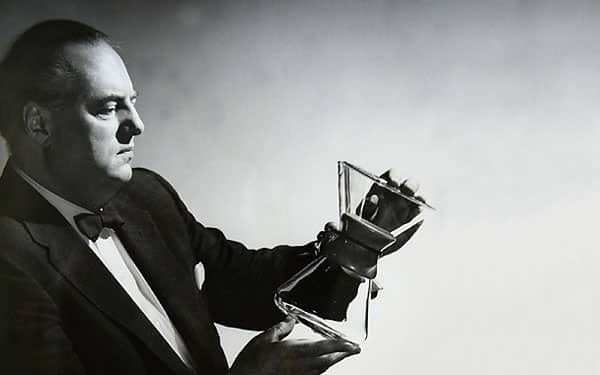
Just in case you haven’t heard about Chemex before (and have landed on this page by accident), let me explain a tiny bit about the Chemex. The Chemex was designed in the early 1940’s by the eccentric inventor and chemist Dr. Peter Schlumbohm. Schlumbohm had a personal mission to make everyday objects more useable, more beautiful to look at, and most important: a joy to use.
His background as a chemist allowed him to work out how water and coffee beans interact, and how to get the most flavor out of the ground beans. Dr. Schlumbohm’s knowledge and his knack for design resulted in the Chemex, one of the most iconic of all coffee makers.
Not many people know this, but the design of the Chemex universally considered to be one of the highlights of 1940’s design. The contrast between the hourglass-style beaker, the wooden handle, and the leather cord that keeps the handle in place has prompted a famous design author to call it a “synthesis of logic and madness.” It has even been seen in the very stylish TV show Mad Man in the infamous Don Draper’s kitchen [image!]. But maybe the most important testament to the Chemex’ beautiful design is that it is in the collection of the Museum of Modern Art in New York.
The Chemex is, in my humble opinion, the only worthy alternative to the traditional dripper cone for making pour-over coffee.
what do you need to make coffee in a chemex?
There are a couple of things you need to have to make coffee in a Chemex. First, of course, a Chemex.
The Chemex comes in the classic version with the wooden handle which is kept in place by a leather cord. Chemex also offers a version with a glass handle. So, no wood and no leather, all glass. Finally, if you want to splurge, Chemex comes in a hand-blown version. Really lovely, but a bit more expensive. You’ll also need to decide on which size you want: a 3-cup, 6-cup, 8-cup or ten cups version for the classic edition and glass handle version or a 3-cup, 5-cup, 8-cup or 13-cup version for the hand blown Chemex.
Wow! So many choices!
Let’s take a look:
Which chemex should i choose?
Deciding which Chemex version to buy, can be a challenge. So many versions!
But let’s keep it simple.
There are only a few consideration you need to make to decide which version is perfect for you.
Easy cleaning vs. classic design
The Chemex that has been around for decades and is quite literally a museum piece comes with the wooden handle and the leather cord. A newer version is entirely made of glass. While beautiful, the classic version is a tiny bit more difficult to clean. You can submerge the full glass Chemex in soapy water, rinse it, and dry it with a kitchen towel. Easy-peasy. The classic version can be rinsed and washed, but I wouldn’t submerge it. That might affect the leather (which you could remove, no problem). And drying the Chemex near and under the wooden handle is, well, less easy. Don’t get me wrong, the classic Chemex is a joy to use and easy to clean. But the glass version is just a bit easier to clean.
Verdict: if looks are more important: choose the classic version (unless you prefer the looks of the glass version, of course). If cleaning needs to be as easy as can be: choose the glass version.
Size: big vs. small
As said, the Chemex comes in a load of different sizes. Let’s focus on the dimensions of the ‘normal’ versions (classic and glass handle) and leave the hand blown versions out of scope. The difference is minimal.
In a way, size doesn’t matter with the Chemex. At least not for the flavor of your coffee. Automatic drip coffee makers usually perform best when you brew a full carafe of coffee. For the Chemex, the only thing that matters is the amount of coffee and the amount of water, not the size of the Chemex.
But one thing to consider is the size of your kettle. Many kettles brew 34oz or 1 liter of water whereas the 10-cup Chemex has a capacity of 50oz or 1.5 liters, and the 8-cup Chemex has a capacity of 40oz or 1.2 liters. So, if you have a 34oz or 1-liter kettle, you’re probably best off with the 6-cup Chemex.
The only situation in which the 3-cup Chemex is preferable is, in my opinion, when you only brew coffee for yourself and when storage space is an issue.
Verdict: In my opinion, the 6-cup Chemex is in the so-called ‘Goldilocks’ zone. Not too big, not too small. Makes a great cup if its only you, and will serve you well when you have friends or family over for coffee.
The ‘normal’ vs. the hand blown Chemex
The ‘normal’ Chemex comes in the classic version with the wooden handle and in a version with a glass handle. The hand-blown version comes only with the wooden handle.
The hand-blown Chemex is the luxurious option. Thick hand blown beaker feels excellent and gives you the impression that you are holding a premium product. And you are paying a premium for that too. I think you’re better of saving the money and buying better coffee beans. Making the beautiful Chemex even more beautiful seems redundant to me. But hey, you are the master of your own wallet.
Click here to check the price of the hand-blown Chemex on Amazon.
Unfortunately, the hand-blown Chemex doesn’t come in a 6-cup version. You have the choice between a 15 oz, 40 oz, or 65 oz version.
coffee, filters, kettle & scales
Besides the Chemex itself, you’ll need a couple of things to start making a Chemex brew. Take your preferred coffee, use the original Chemex filters (believe me, you don’t want a knock off), put water in the kettle an set up your scales.
Coffee, filters and a kettle are apparent. But kitchen scales might not be. They are optional, but for repeatable results I highly recommend them. You can weigh both your water and your coffee. This allows you to repeat the optimal coffee to water ratio when you find it, and it will allow you to record your experiments with a little more (or less) coffee or a little more (or less) water.
Let’s also talk a bit about the kettle. Any kettle will do. Electric or stove top, it doesn’t matter. But if you really want to up your game, you might want to consider a gooseneck kettle. The most significant advantage of a gooseneck kettle is that you have far more control over the water flow. Which is a big advantage when making pour over coffee. Gooseneck kettles come in either a stovetop or electric version. The best also come with some sort of temperature control to achieve the ideal water temperature for making coffee.
Chemex brew guide
Ok, finally we are ready. Let’s grind some coffee, pour some water and let the java flow!
Grind size for chemex
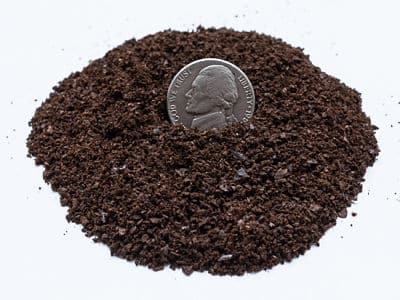
For brewing coffee in a Chemex you want a medium-coarse grind. A medium-coarse grind has the consistency of sea salt or rough sand. The picture should give you a rough idea of what the coffee grounds should look like.
If your are using a Baratza coffee grinder (they are very popular among home barista’s), you should use a grind setting between 18 and 22.
Of course, as with any of the ingredients and variables of coffee, you can tweak the grind size. Make it a bit coarser or a bit finer in your experiments to make that perfect cup.
coffee to water ratio for chemex
The balance between the amount of coffee and water used in the brewing process is the big question in any brew guide. The rate of coffee to water, the size of the grind and the time that the water is in contact with the coffee determines the extraction. Over-extraction leads to a really bitter coffee. Under-extraction leads to coffee that is too sour or even salty.
The golden ratio is the ideal coffee to water ratio. No under or over extraction, a perfectly balanced cup. The Specialty Coffee Association of America (the SCAA) has published a golden ratio of 55 grams (plus or minus 10% depending on the type of coffee and the roast) of coffee per liter of water.
This is all really nice, but what is right for the Chemex. The golden ratio for the Chemex depends on the specific characteristics of the ‘device.’
So, let’s cut to the chase. The ideal coffee to water ratio for most people using a Chemex lies somewhere between 1:12 and 1:17. This means that when using the 6-cup (or larger) Chemex you use the following ratios:
chemex coffee to water ratio's (metric and imperial)
Ratio
Coffee (metric)
Water (metric)
Coffee (imperial)
Water (imperial)
1:12
57 grams
680grams/ml
2 ounces
24 ounces
1:13
52 grams
680grams/ml
1,8 ounces
24 ounces
1:14
49 grams
680grams/ml
1,7 ounces
24 ounces
1:15
45 grams
680grams/ml
1,6 ounces
24 ounces
1:16
42 grams
680grams/ml
1,5 ounces
24 ounces
1:17
40 grams
680grams/ml
1,4 ounces
24 ounces
The variables are set. Now, let’s brew:
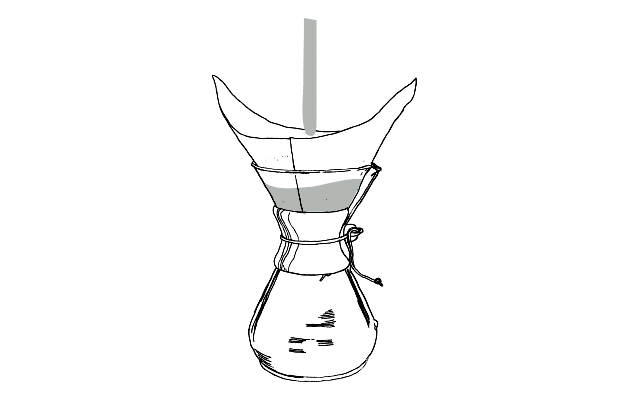
Step 1: rinse the filter and pre-heat the Chemex
With your coffee grounds and hot water at the ready, it’s time to start brewing! First, unfold the filter and place it in the Chemex. The Chemex filters (as said, use the real ones!), when unfolded correctly, have a triple fold side and a single fold side. Make sure the triple fold side is on the side of the Chemex with the sprout. The filter should lay across the sprout without blocking it.
Pour hot water onto the filter to rinse out any paper taste. This simultaneously preheats the vessel. Pour the water out through the sprout.
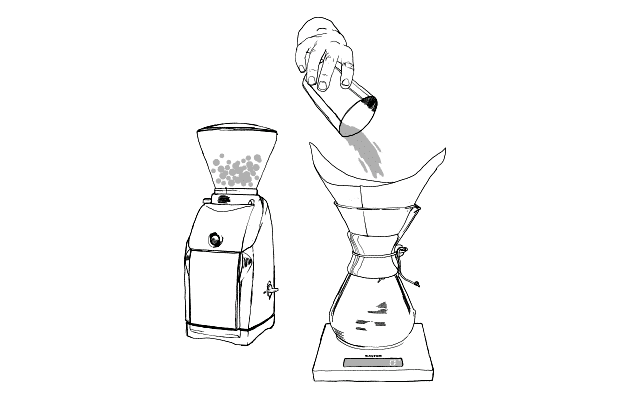
Step 2: add coffee and let it bloom
The next step is to grind your coffee to a medium-course grind size. Pour the ground coffee in the filter and gently shake the Chemex to level to the bed of coffee grounds. This allows for a nice and even pour and extraction.
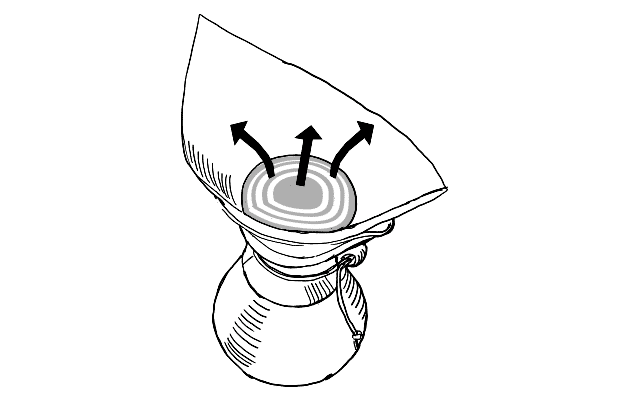
Next, is the bloom.
The bloom allows carbon dioxide that got trapped in the beans during the roasting process to disperse, and it provides for a nice even saturation during the rest of the brew time. For the bloom slowly pour twice the amount of water that you have coffee. For example, when you use the 1:12 ratio from the table above, pour 110 grams or 4 ounces of water on your 55 grams or 2 ounces of coffee.
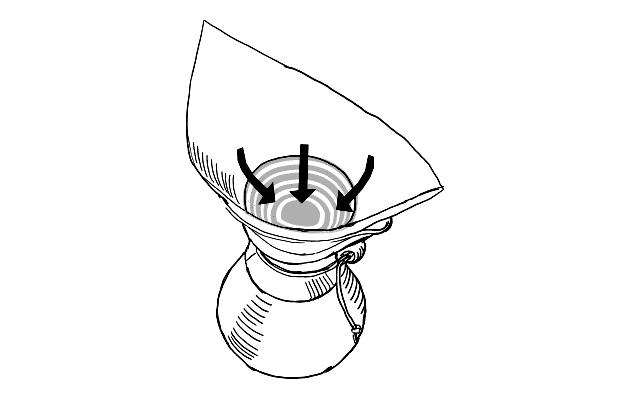
Be sure to pour slowly in a circular motion, working your way outwards from the center. But do not pour directly on the sides of the filter (this will run through without touching any coffee)! Allow the coffee to bloom for 40 – 50 seconds.
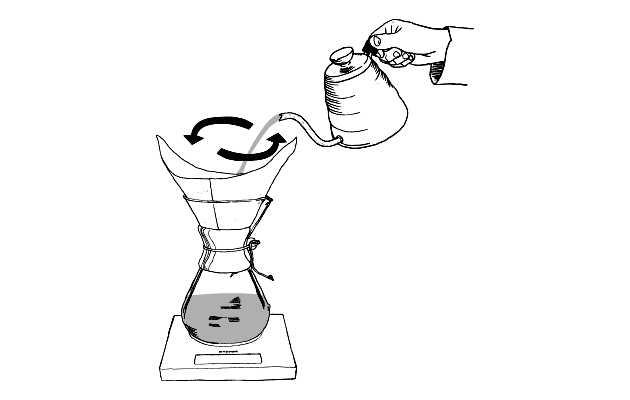
Step 3: pour in the rest of the water in three pours
After the coffee has adequately bloomed, add the rest of the water in three pours of about 200 grams or 7 ounces of water. Again, use a circular pouring motion, starting in the center, while avoiding to pour on the filter.
Start the next pour when roughly 75% of the water has run through.
Step 4: wait for the water to go through
After the last pour, all you have to do is wait for the water to run through completely.
The entire brew process should take between 3 ½ and 4 ½ minutes. Total brewing time is essential because when the brew time is too short, you will have under-extracted coffee, and when the brew time is too long, you end up with over extracted coffee.
If your brew process took far longer than 4 ½ minutes, try a coarser grind to allow the water to run through faster. If your brew time is considerably shorter than 3 ½ minutes, try a finer grind to prevent the water from running through as quickly.
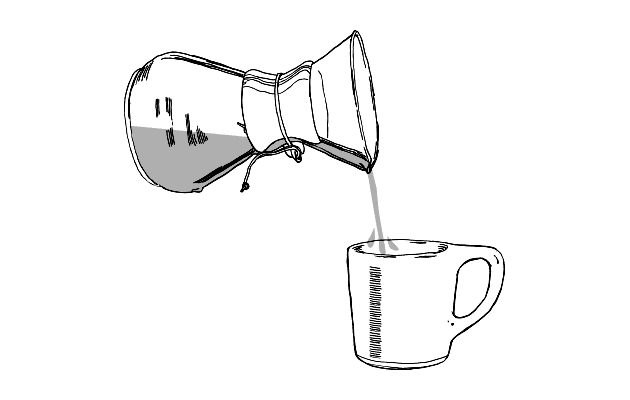
Step 5: enjoy!
Now, all that is left is to pour the coffee into a pre-warmed cup and enjoy!
alternative chemex brew methods
My advice is to start with the basic brew method described above. Get a good feeling for the pouring technique and find out how the coffee tastes with your favorite beans. When you have found the optimal coffee to water ratio for your perfect cup, and when you feel adventurous, you’ll love the next part.
Below are some videos of barista’s, Chemex world champions, and other coffee geeks showing their tried and tested brew methods. Let’s see what we can learn!
Elemental Coffee Roasters
In the video below, Paul from Elemental coffee roaster shows the way they make coffee in a Chemex. The process is an interesting variation on the process described in this article.
Stumptown Coffee Roasters
Stumptown is probably the best coffee roaster and coffee bar in Portland. They now have several branches in the big cities (in the U.S.). Another great brew method to try.
1st International Chemex Cup winner recipe
The 2017, as part of the Berlin Coffee Festival, the first international Chemex Cup was organized. The winner of the gold Chemex, Haider, shares his recipe and method in the video below. Also a nice look at the great atmosphere at the Berlin Coffee Festival.
If the video’s above teach us anything, it is the value of experimentation. There are some many ways to make great coffee with a Chemex. Just make sure you stay close to the recommended coffee to water ratio’s. Tweak as much as you like. Playing around with pour over coffee is part of the home barista lifestyle!
conclusion
I hope all of the above gives you a good idea of the versatilty of the Chemex coffee maker. If you already own one: start playing with it and have fun!
If you haven’t got one yet, maybe it’s time you treat yourself : )
Click here to check the price of a Chemex coffee maker on Amazon.
Let the java flow!
Monsieur Coffee
You might also be interested in our Chemex vs Hario V60 Brew Method Stand-off


Pingback: Why are Chemex filters so expensive? - Monsieur Coffee