
Knowing how to make coffee without a coffee maker can be a lifesaving skill.
What if, one morning, you wake up, stumble into your kitchen turn on your coffee maker, and… nothing.
No lights, no bubbling, no comforting smell of freshly brewed coffee. What do you do?
Or what do you do when you are out camping? There are some great ways to get your caffeine fix when you are out in the wilderness, but sometimes you have to improvise.
For me, it’s mainly fun. I like experimenting. How can I make the best coffee without any of my fancy gear?
To be fair. A lot of the methods are variations on the same thing. They mostly methods to separate the coffee grounds from the liquid after brewing. Not very remarkable because that’s precisely one of the most important functions of a coffee maker.
But still, it’s a lot of fun to see how we can make a good cup of coffee without all the (sometimes expensive) coffee gear we love to think we need.
What do you need to keep in mind when making coffee without a coffee maker?
When you need to improvise, you probably won’t brew the best coffee ever. A tried and tested method you are comfortable with, will probably have a better end result.
But even when your brew method is improvised, there are a few golden rules that will have a positive impact on your brew.
Rule #1: use freshly roasted coffee beans
The freshness of coffee beans have a significant impact on taste. So, you are always better of using freshly roasted coffee beans. In a perfect world you would use coffee beans that have been roasted no longer than 6 weeks ago.
But, if you need to make coffee without a coffee maker, it might mean that conditions are not optimal. To the rule is: use coffee that is as fresh as possible.
Rule #2: Use Freshly Ground coffee beans
Besides the freshness of the roast, the grind matters a lot for the taste of you final brew. It is always best to grind your coffee right before you brew. But again, conditions might not be optimal.
Maybe you are perfectly satisfied using preground coffee anyway. So, the rule is: grind coffee beans right before you use them if at all possible. Or, ignore this rule completely if you use always preground coffee (and have no issues).
Rule #3: Use water you would drink
Some people only brew coffee with bottled water. Whether you should too totally depends on the water quality in your area. A general rule is: when you can drink the water from the tap, it is good enough to make coffee with. The rest is a matter of taste.
Rule #4: ignore rules 1 to 3 if you have to
Rules are great. They can help you make the best coffee. But, again, conditions might not be perfect. If so: work with what you have. Make the best of it. You can do it.
Emergency coffee making methods
Now that we have esthablished the rules (and why you should sometimes ignore the rules) we are ready to dive in. We’ll take a look at seven different methods: the saucepan method, the strainer method, the improvised filter method, the French-Press-without-a-French-Press method, how to make cowboy coffee, the swedish egg method, how to make cold brew coffee, how to make one cup of coffee without a coffee maker, and finally how to make coffee in a microwave.
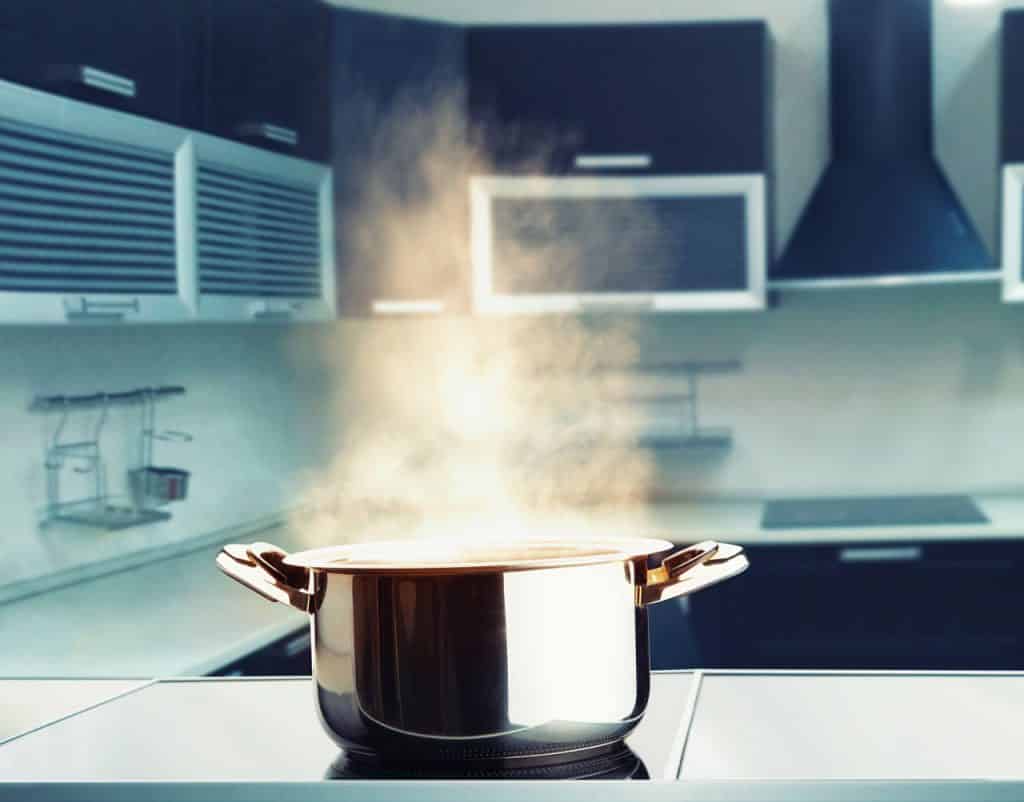
#1: How to make coffee in a saucepan
Making coffee in some sort of vessel you can place on a stove-top (or fire) is the most basic way of making coffee.
You heat water, add coffee, allow the flavor to extract, and then you pour. The difficulty lies in pouring off the coffee without having coffee grounds end up in your cup.
Materials and ingredients for the saucepan method
Materials
- A (sauce)pan or something else – with a wide opening – you can place on a stove-top.
- A spoon to put ground coffee in the water and to stir
- A mug to put your coffee in
- Optional: a spoon to ladle your coffee into the mug (but you can also just pour)
Ingredients
- Water
- Coffee beans or ground coffee
Saucepan method brew guide
Step 1: measure out your water. Use 2 cups for a big mug of coffee and 1 cup of water for a small one. Add to that a bit of water for evaporation during boiling and for the water that stays behind in the pan with the coffee sludge. For me, either 2 ¾ cups of water or 1 ½ cups of water works best.
Step 2: grind your coffee. Off course, the amount of coffee depends on taste. More if you want stronger coffee, less if you prefer it less strong. An excellent place to start is 2 ½ tablespoons of ground coffee per cup (not counting the extra water). So either 5 tablespoons or 2 ½ tablespoons if you follow the water amount at step 1.
Grind you coffee medium-fine. Not as fine as you would for espresso, but a little finer than for a regular drip machine. If you are using regular pre-ground coffee, I would advise you to put in ½ to 1 tablespoon extra. Adjust to taste.
Step 3: Place the pan on the stove-top, fire, or another heat source. Bring the water to a boil and add the coffee. Stir well, take off the heat and cover. Allow the coffee to sit undisturbed for at least five minutes. This allows the coffee to extract and enable the grounds to sink to the bottom. It is important not to stir or shake. Otherwise, there will be coffee grounds left in your coffee.
Step 4: carefully pour or ladle the coffee in your mug. Try not to disturb the bed of coffee grounds on the bottom to avoid getting any of them in your cup. Crunchy coffee is no good.
Enjoy!
Pro tip: for my French Press I use a method where you allow most of the grounds to sink to the bottom by leaving the liquid alone for up to 10 minutes! It is well described in this video (although it used a French Press).s
I have had great success with this method for my French Press, and I have tried it for this saucepan method. If you dare, try it! The coffee will off course be slightly colder. Don’t be afraid you will end up with an undrinkable, super-strong cup. You won’t. If you leave the liquid undisturbed, the coffee will have sunk to the bottom, long before over-extraction takes place. The super-strong, bitter part of the liquid will remain in the pan with the grounds.
#2: How to make coffee using a strainer
With this method, you make coffee in precisely the same way as with the saucepan method.
The difference is that separating the grounds from the liquid is made easier by using a fine mesh strainer.
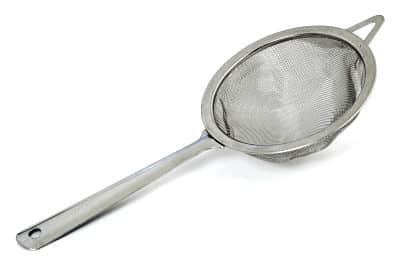
With this method, you make coffee in precisely the same way as with the saucepan method. The difference is that separating the grounds from the liquid is made easier by using a fine mesh strainer.
Materials and ingredients for the stainer method
materials
- A (sauce)pan or something else – with a wide opening – you can place on a stove-top.
- A spoon to put ground coffee in the water and to stir
- A fine mesh strainer. The mesh should be finer than your grounds.
- A mug to put your coffee in
ingredients
- Water
- Coffee beans or ground coffee
Strainer method coffee brew guide
Step 1 to 3 are exactly the same as with the saucepan method. So, for detailed instructions, see the saucepan method.
Step 1: measure out your water
Step 2: grind your coffee
Step 3: bring the water to a boil, add coffee, stir and take off the heat. Cover and let sit for 5 minutes.
Step 4: This is where the strainer comes in. You uncover your pot and pour the liquid into the mug through the strainer. The coffee grounds stay behind in your strainer, and you can enjoy a cleaner cup of coffee.
Enjoy!
#3: How to make coffee using an improvised filter
The downside of using the saucepan method or the strainer method is that no matter how careful you are, some coffee grounds and a lot of fines will end up in your cup of coffee. The fines are the smaller parts of broken down coffee beans. A good grinder will provide you with a pretty even grind, but there will always be fines. Fines stay in suspension longer, because they are lighter than the larger grounds, and make your coffee taste a bit muddy.
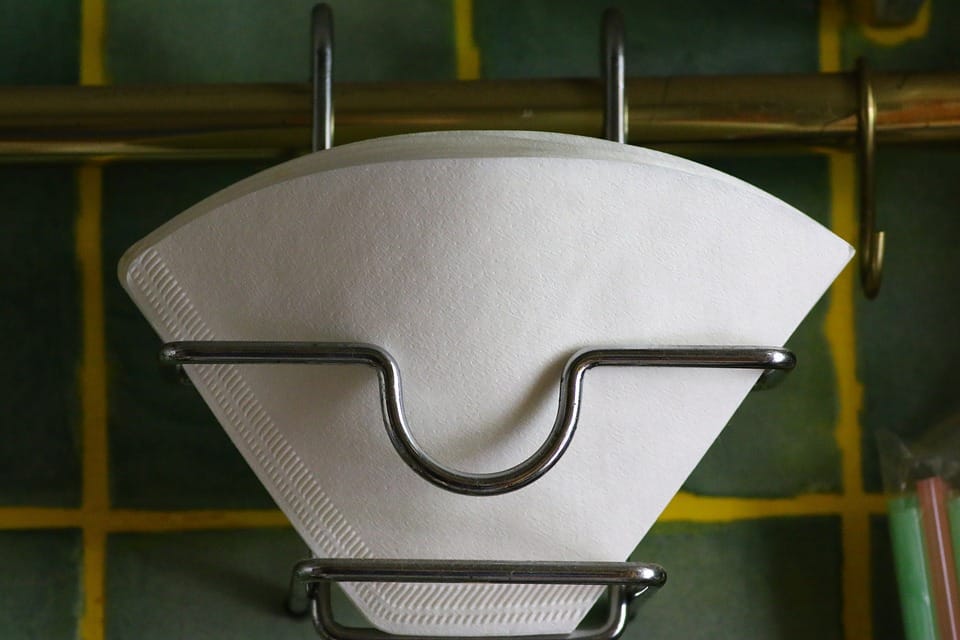
The solution for this is to use a filter. Like the paper filters, you use with your drip coffee maker, pour-over cone, or Chemex. When you want to make coffee while you don’t have access to a coffee maker, you can try to improvise a filter.
You essentially find a way to secure a filter or filter-like material to your cup, you put in the grounds, and you pour on the water. Be sure to use a large mug or even a jug or measuring cup which has enough room for the coffee and for the filter to hang in to.
For filters, you have a few options:
The traditional paper filter: when your drip coffee maker is broken, or there is a power outage, but you have paper filter laying around, that’s great. A ‘real’ paper filter is your best option.
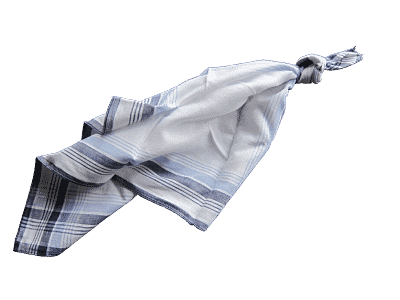
The handkerchief: a thin cotton handkerchief is probably the next best thing. It is thin, so it allows the coffee to flow through easily. But it is also tough enough to withstand the high water temperature, and it will not tear during the process.
Be sure that it hasn’t been washed with a softener or a highly perfumed washing detergent though, this will make your coffee taste soapy. It is best to thoroughly rinse it with hot water before you use it for coffee making.
The cheesecloth: this also a great option. Be sure double or triple fold the cheesecloth to make sure no grounds and fines can be washed into the coffee

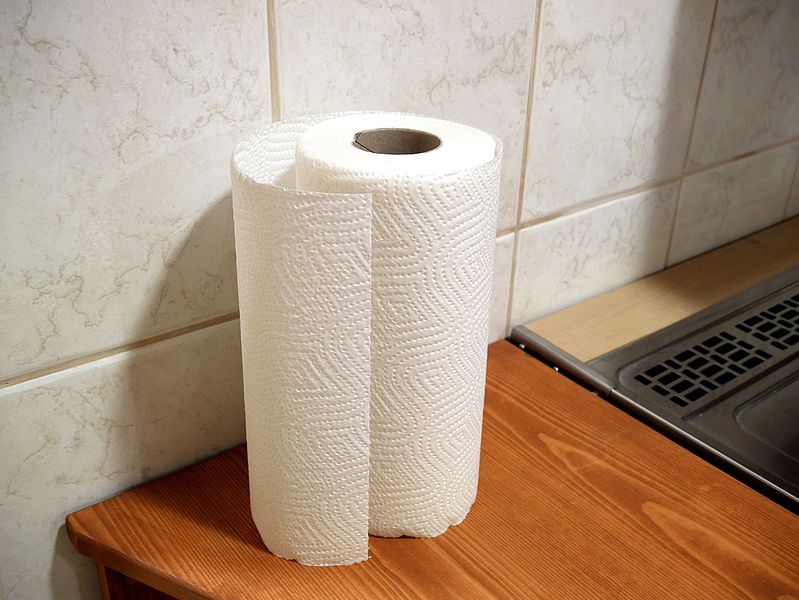
The paper towel: your option of last resort is the paper towel. These work well, but you have to make sure the paper towels are tough enough to hold the coffee and water when they are wet. It might be best to use two or three layers to avoid tearing. And make sure it is not perfumed!
Materials and ingredients for an improvised Coffee filter
materials
- A means to boil water (e.g., a kettle or a pan)
- A large mug, a jug or a measuring cup
- Improvised filter material (a paper filter, handkerchief, cheesecloth or paper towels)
- Paper clips, binders or elastic bands to fasten the makeshift filter to the mug, jug or cup.
ingredients
- Water
- Coffee beans or ground coffee
Improvised filter method coffee brew guide
Step 1: make your improvised filter:
- Fold open your paper filter. Or:
- Fold your handkerchief into a square large enough to cover the mouth of the vessel with a bit of overhang. The handkerchief should be able to hang into the vessel (about 1 inch deep) to allow the coffee and water to mix. If you are using a wide mouth measuring cup, it is best to use two handkerchiefs placed on top of each other. Or:
- Fold your cheesecloth into a square and allow for overhang when it is pushed into the vessel about 1 inch deep. Or:
- Place two or three paper towels on top of each other.
Step 2: secure your improvised filter to the sides of the mug, jug, or cup using paper clips, binders or elastic bands. Make sure it is fastened tight enough to ensure that it won’t slip.
Step 3: measure out 1 ½ cups (roughly 350 ml) of water and bring to a boil.
Step 4: grind two heaped tablespoons of coffee beans (25 grams) and grind them medium-fine. If you are using pre-ground coffee, use two (non-heaped) tablespoons (also 25 grams).
Step 5: put the ground coffee into your makeshift filter and shake it to even the bed.
Step 6: let the boiled water cool down for 30 seconds to a minute and pour a bit of water on the grounds. Not too much. Only enough to just wet the grounds. Let it ‘bloom’ for thirty seconds. The bloom allows the CO2 gas trapped in the coffee to escape.
Step 7: slowly pour in the rest of the water in four parts. Wait for thirty seconds between pours. Unless you see the bed of coffee falling dry. In that case, do the next pour just before the bed falls dry. And grind your coffee beans a bit finer for your next cup.
If the coffee takes a long time to run through, your filter may be too thick. Help it along by slowly pushing the coffee to the sides of the filter. And grind your coffee beans a bit coarser for your next cup.
Step 8: when all of the water has run through, remove the filter, and enjoy.
#4: How to make French Press coffee without a French Press
French press coffee without a French press is not French press coffee. That’s impossible. But what we’re trying to do here is mimic the taste of French press coffee, without the device. You’ll see that this method is – again – very similar to the saucepan method. There is a distinct difference in taste, though. We use a coarser ground and lower temperature water. Also, we add the water in steps allowing for a bloom.
All this results in a more oily, full-bodied taste.

Compared to the saucepan method (or the cowboy coffee, which we will discuss later) this cup will taste a little more… refined if you will.
The saucepan/cowboy coffee is big and powerful, but still smooth. This faux-French Press is a bit more delicate.
Materials and ingredient for faux-french press coffee
materials
- A means to boil water (e.g., a kettle or a pan)
- A heatproof measuring cup (preferably with a pouring spout)
- A spoon to ‘break the crust.’
- A mug
ingredients
- Water
- Coffee beans or coarsely ground coffee
French Press without a French Press brew guide
Step 1: measure out your water. For one medium-sized cup of coffee, use just over one cup of water (about 275 ml). Bring to a boil.
Step 2: grind your coffee. For just over one cup of water use two tablespoons of coffee beans (about 17 grams). Grind to a relatively coarse consistency (think: sea salt).
Step 3: put the coffee in the measuring cup. When the water comes off the boil, wait for 30 seconds to one minute to cool it a bit. Then add just enough water to wet the grounds, and allow to bloom for 30 seconds.
Step 4: After the bloom, add the rest of the water in one go. After one minute, push down the crust that has formed on top with a spoon. If you can, cover the measuring cup with a lid or plastic wrap to contain the heat. Wait for three more minutes.
Step 5: After four minutes, most of the grounds should have sunk to the bottom. If a few remain floating on top, carefully knock them down with the spoon without disturbing the bed that has formed on the bottom.
Now, carefully pour the coffee in your cup. If all goes well, all coffee grounds should stay behind in the measuring cup.
Now enjoy your – probably pretty good – cup of faux French Press.
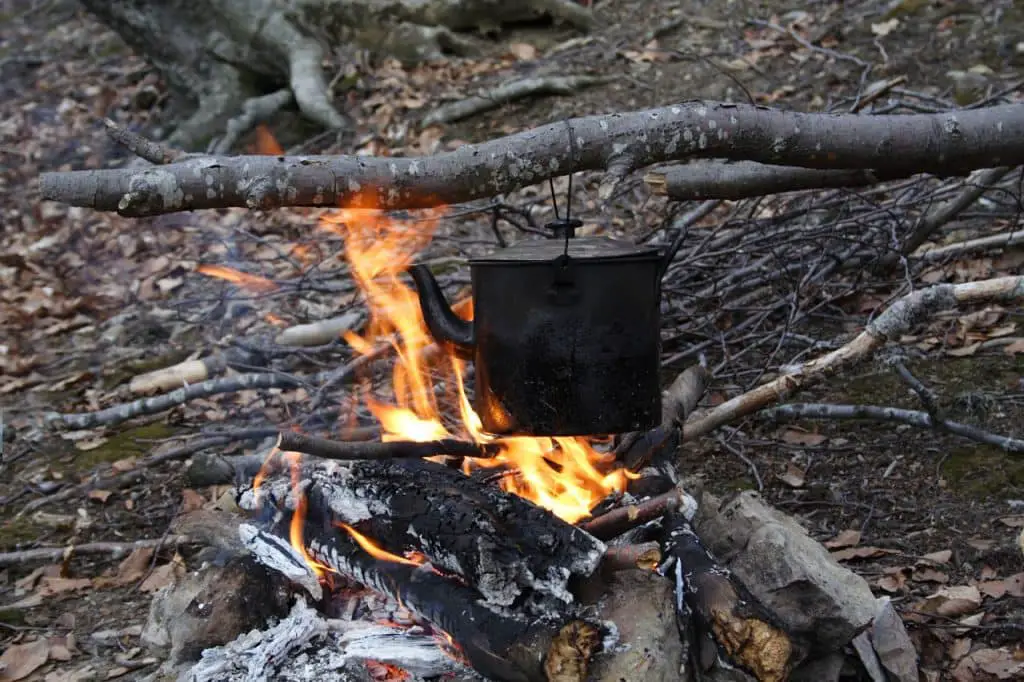
#5: How to make cowboy coffee
Making cowboy coffee has a nostalgic ring to it. Tough, weather-worn men on horseback. Sleeping under the stars, and waking up to a smoldering fire made the night before. How do you make coffee like a cowboy? Easy, use the smoldering bits to reignite the campfire and start your brew.
This method is very much like making coffee in a saucepan. And yet, still different.
Materials and ingredients for the cowboy coffee method
Materials
- A kettle, pot or lidded pan
- A fire (or a different heat source)
- A spoon
ingredients
- Ground coffee
- Water
Cowboy coffee brew guide
Step 1: get your fire (or another heat source) going
Step 2: add water to the kettle, pot, or pan. Use 8 oz (1 cup) or roughly 250 grams of water per serving.
Step 3: add coffee to the water and stir or swirl to get all grounds wet. I assume you use pre-ground coffee for this. Because, why bring a grinder into the wild, but not a manual coffee maker like an Aeropress or a drip cone, right? If you do need to grind the coffee beans, grind them medium-fine. Use two heaped tablespoon (1/2 oz) or about 14 grams of coffee per serving.
Step 4: bring to a boil and take off the heat
Step 5: let it sit undisturbed for at least three minutes to allow the grounds to sink to the bottom of the vessel
Step 6: carefully pour in a mug (or mugs). Pour slowly to avoid the ground coffee to transfer to your cup. Enjoy while watching the misty mountains.
#6: How to make Swedish egg coffee
The Swedes are big coffee drinkers. Sweden actually has one of the largest coffee consumption rates in the world! And they have a really unique method for making coffee without a coffee maker. They use an egg. Don’t let the thought of an egg in your coffee put you off. It took me a while, but once I tried it, I saw the value. It works period. And your coffee doesn’t taste like an omelet.
In fact, I was surprised by how smooth and silky the coffee tastes using the Swedish egg method. It lacks acidity, but it is a really smooth drink!
Materials and ingredients for swedish egg method
materials
- A saucepan or small pot
- A mug
- A small bowl to mix the egg and coffee in
ingredients
- One fresh egg per serving
- Coarsely ground coffee
- Water for boiling
- Ice cold water
Swedish egg coffee brew guide
Step 1: bring 8 oz (1 cup) or about 250 ml of water to a boil in the saucepan or pot.
Step 2: while your water comes to a boil, crack the egg in the bowl, including the shell. Mash the thing to pieces and stir to combine the egg whites and the yolk.
Step 3: stir the ground coffee into the crushed egg.
Step 4: when the water boils add the egg and coffee mixture. Allow to simmer for about three minutes. When you are making more than 3 servings at a time, increase to 5 minutes. Be careful! The boil might be so vigorously that there you run a risk of overflow. Turn the heat down a bit to boil less hard.
Step 5: during the boil, the coffee and egg mixture will clump together in chunks. When the boil time is over, turn off the heat, and splash 1 cup of cold water on top of the slurry. This will cause the chunks to sink to the bottom. Let it sit for about a minute or until all the clumps have sunk to the bottom.
Step 6: carefully pour the coffee off, leaving the slurry in the pan. If you have a strainer on hand, use it to catch the smaller clumps. Enjoy!
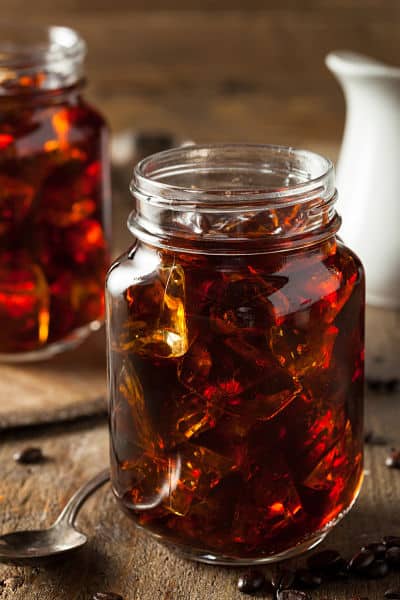
#7: How to make cold brew coffee
Cold-brew is an increasingly popular drink among coffee geeks. Not only because you don’t need a coffee maker for making it. Cold-brew is popular because of the best of reasons: it is delicious. And yes, you drink it cold.
Heating it in a microwave is possible, but you lose much of what makes cold brew soooo good. Have you ever considered coffee could taste almost juicy? Well, cold brew does. The juiciness and the slight acidity (and somehow sweetness at the same time), combined with the fact that it is cold, make it a perfect drink for warm summer days.
Cold-brew is straightforward to make. You need a few materials that can be found in any kitchen and a bit of time. And especially important in this article: you don’t need a coffee maker to make it!
Materials and ingredients for making cold brew coffee
materials
- A lidded jar
- A mug (or if you want to go totally hipster, you drink it from a Ball Mason jar)
- Some kind of filter (see the section on improvised filters)
ingredients
- Water
- Coarsely ground coffee
Cold-brew coffee brew guide
Step 1: decide how much you want to make and adjust the recipe accordingly. When it’s hot, I like my drinks big, so we’ll use 2 cups or roughly 500 ml of water. The amount of cold brew will be a little less, because of the absorption rate of the coffee beans.
Step 2: Weigh out your coffee. For each cup of water, you’ll need 1 oz or 28 grams of coarsely ground coffee. So, for our big batch, we will use 2 ounces or 56 grams of coarsely ground coffee.
Step 3: combine the coffee and water in the jar, stir to combine, and put on the lid.
Step 4: put the cold brew in the fridge for at least 12 hours. The longer you leave it, the stronger it will be. But don’t be afraid to experiment. I have found that only if you leave the cold brew in the fridge for more than 24 hours, the bitterness starts to increase. Between 12 and 24 hours, it is mainly a more robust flavor that develops.
Step 5: when you are ready to drink your cold brew, you’ll need to strain it. Because you have used a coarse grind, a fine mesh strainer is enough. Pour the coffee straight from the jar in your cup(s) or hipster ball jars. Enjoy!
Pro tip: if I want a really clean cup, I pour my cold brew through a paper filter placed in a drip cone. This catches all the fines, leaving you with a really clean cup of cold brew. If you don’t have a drip cone on hand, you could also place an unfolded handkerchief or a thin cloth in the strainer to achieve the same result.
#8: How to make ONE cup of coffee without a coffee maker
All the methods above use extra materials (a saucepan, a strainer, an improvised filter) to make coffee when a coffee machine isn’t available. But could you make a good cup of coffee without any of these? Can you make coffee with just a cup, some ground coffee, and hot water? The answer: yes, you can!
I came across this method when attending a wedding in Poland. At breakfast in the morning, I saw cups, a put of ground coffee and a hot water urn (a large electric kettle keeping the water warm). I didn’t know what to do, so I asked one of the locals.
It appeared that this is a very common way coffee is served at a breakfast buffet in some areas of the world.
And it works!
Though very similar to the French Press without a French press method, it is slightly different. And it works with store-bought ground coffee.
Here is how it goes.
Materials and ingredients for one cup of coffee
materials
- A cup
- A teaspoon (or something similar)
ingredients
- Hot water, just off the boil
- Ground coffee
Brew guide for one cup with only ground coffee and water
For this brew guide, I assume you are using a standard size coffee cup. These are about 8 oz (1 cup) or roughly 250 ml in size. If you are using a larger cup, adjust the recipe to fit your bill. To make the coffee put one heaped teaspoon of ground coffee in the cup. The coffee should be ground as fine as the stuff you buy at the grocery store.
Once the coffee is in the cup, add hot water until the cup is as full as you would typically fill a cup. Then leave it for at least 3 minutes to allow the grounds to sink to the bottom. DO NOT STIR OR SHAKE. You need to leave the coffee alone to let the grounds sink . to the Otherwise you’ll end up with a very crunchy cup of coffee.
I found the coffee from this method. Very enjoyable. A perfectly acceptable way to get your caffeine fix when there is no coffee machine available. You can adjust the strength of the coffee by adding more or less ground coffee. I had my preferred strength dialed in within three cups of coffee at breakfast.
#9: How to make coffee in a microwave
The quick version of the method above is using a microwave. You just heat a cup of water in a microwave. Add coffee, stir (yes, in this case, you do), and wait. Really simple, and it works. Ideal for when your coffee machine is broken and you need a quick caffeine fix before heading out to work.
Materials and ingredients for microwave coffee
materials
- A microwave
- A mug
- A spoon
ingredients
- Ground coffee
- Water
Microwave coffee brew guide
Step 1: put water in your mug. I assume your mug is large enough to accommodate about 8 oz (1 cup) or roughly 250 grams of water. Adjust the amount of coffee you add when using more or less water.
Step 2: heat the water in the microwave at full power for about two minutes. The water should be hot, but not boiling.
Step 3: Add one tablespoon of medium ground coffee and stir. Leave the mug to sit for at least four minutes to allow the grounds to sink to the bottom.
Step 4: enjoy!
#10: The option of last resort: instant coffee
You’ll find them in lots of hotel rooms. Packets of instant coffee. Although I don’t prefer instant coffee (it feels very ‘processed’ to me) we can’t turn it down as a viable option.
When you know beforehand you won’t have access to a coffee machine, and you need your steamy cup of joe, get some ‘good’ quality instant coffee. There is nothing wrong with that.
conclusion
We have gotten very used to the luxuries the 21st century has to offer. Shiny, luxury coffee machines seem to become the norm. But as this article hopefully shows: you don’t really need them for a good cup of coffee. This might sound very minimalist (and believe me: I’m not!), but sometimes it feels good to go back to basics and to do more with less stuff.
Anyway, I hope you learned something. Until next time.
Caffeinated greetings,
Monsieur Coffee
Click the button below to check it out.